Uninstall CrySiS virus (Uninstall Guide) - Sep 2016 updated
CrySiS virus Removal Guide
Description of CrySiS ransomware virus
The threats of CrySiS ransomware
CrySiS ransomware virus has been threatening computer users since the beginning of 2016. Since then, the virus has changed its methods of distribution and now it targets the different region. From the early August, it started attacking people and businesses located in Australia and New Zealand. However, if you are living in the different part of the world, you should not feel safe. This or another ransomware virus can still find the way to your PC. Once CrySiS virus infiltrates computer’s system, it starts encrypting the files. The virus can corrupt various file formats by adding .CrySiS file extension. When file encryption process is over victims cannot access any of their files. However, the crooks leave a ransom note Howto_Restore_FILES.TXT where they explain that victims have only 72 hours to pay the ransom. Later their decryption key will be destroyed, and users will never get their files back. However, if you have encountered this virus, data encryption should not be your priority. You have to remove CrySiS virus first. Only then, you can think about recovering encrypted data. But let us remind you that hackers rarely give the decryption key. They are only interested in generating money and creating new illegal projects.
For file encryption, the virus uses AES and RSA algorithms that include a public and a private key. CrySiS virus locks files with a public key, so for encrypting the files, victims need a private key. According to the crooks, the private key is located in ‘special secret server.’ Unfortunately, this key is the only way to restore your files at the moment. Different sources claim that the amount of ransom varies from 300 GBP to almost 800 GBP. Is it worth paying? Absolutely not. Paying the ransom is a risky decision that might not help to recover your files. In the ransom note the hackers try to convince users that it’s impossible to remove the virus; however, it’s not true. You should initiate CrySiS removal as soon as it appears on your PC. Anti-malware tools such as FortectIntego might be handy in ransomware elimination process too.

Methods of distribution
When CrySiS ransomware appeared for the first time, it mostly attacked users via malicious email campaigns and fake software installers. Now the crooks decided to change methods of distribution and started using Remote Desktop Protocol (RDP). RDP allows users to remotely access computers, local devices and even files located on remote PCs. So, CrySiS ransomware virus launches aggressive attacks until it manages to get inside a remote computer. Moreover, the virus cannot be satisfied with only encrypting the files on a remote computer. It can attack connected computers and encrypt their files too. This feature is especially dangerous for big companies that use RDP on the daily basis. However, users can protect their computers from viruses. They have to avoid suspicious domains and file-sharing websites, don’t download unknown or questionable software, and stay away from shady emails.
Is it possible to remove CrySiS and restore encrypted files?
CrySiS removal is a hard, but attainable task. Ransomware type viruses usually are capable of blocking anti-malware programs or preventing them from scanning computer’s system. However, it’s still possible to do it. If you don’t have any anti-malware program, we recommend using FortectIntego or SpyHunter 5Combo Cleaner. If you already have it, make sure you are using the updated version of it. In order to help you, we prepared detailed instructions how to remove CrySiS which you can find at the end of the article. Unfortunately, eliminating the virus is not enough to restore locked files. At the moment there’re no free decryption tools that could help to recover the data. However, if you have made backup copies, you can restore your data from them. If not, take CrySiS attack as a hard lesson that you should regularly backup your files and store them in external devices. Nowadays the Internet is full of dangerous viruses that are capable of encrypting or deleting your files. So, you should always be prepared for the worst.
Getting rid of CrySiS virus. Follow these steps
In-depth guide for the CrySiS elimination
Important! →
The elimination guide can appear too difficult if you are not tech-savvy. It requires some knowledge of computer processes since it includes system changes that need to be performed correctly. You need to take steps carefully and follow the guide avoiding any issues created due to improper setting changes. Automatic methods might suit you better if you find the guide too difficult.
Step 1. Launch Safe Mode with Networking
Safe Mode environment offers better results of manual virus removal
Windows 7 / Vista / XP
- Go to Start.
- Choose Shutdown, then Restart, and OK.
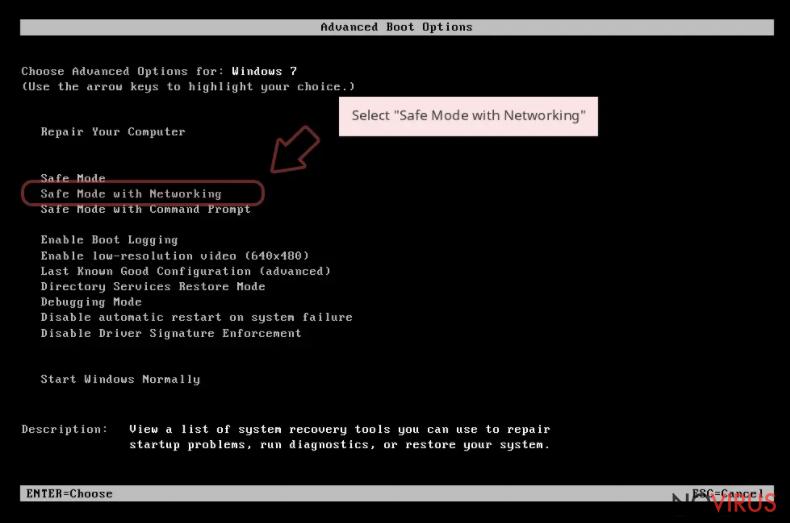
- When your computer boots, start pressing the F8 button (if that does not work, try F2, F12, Del, etc. – it all depends on your motherboard model) a few times until you see the Advanced Boot Options window.
- Select Safe Mode with Networking from the list.
Windows 10 / Windows 8
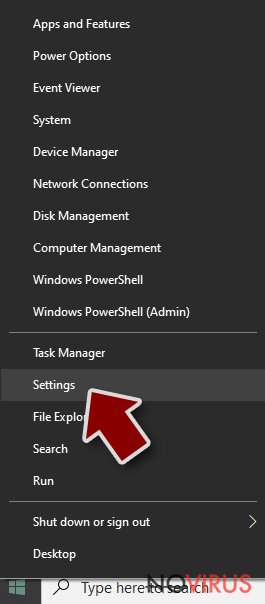
- Right-click the Start button and choose Settings.
- Scroll down to find Update & Security.
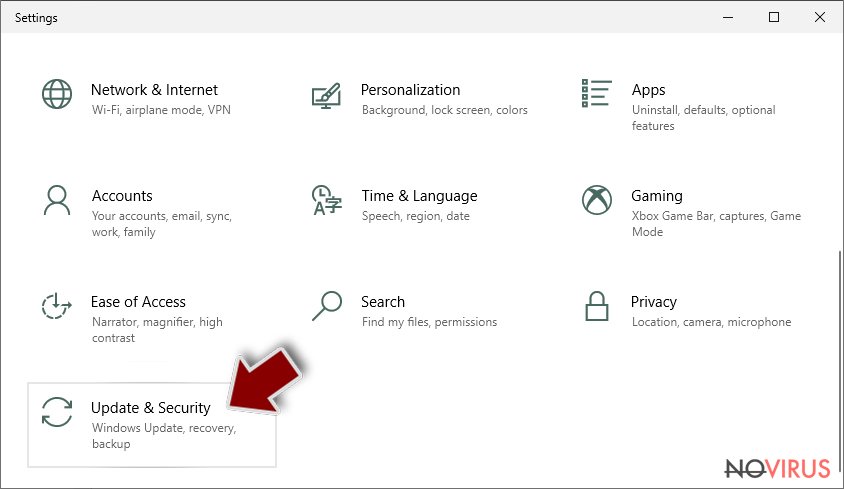
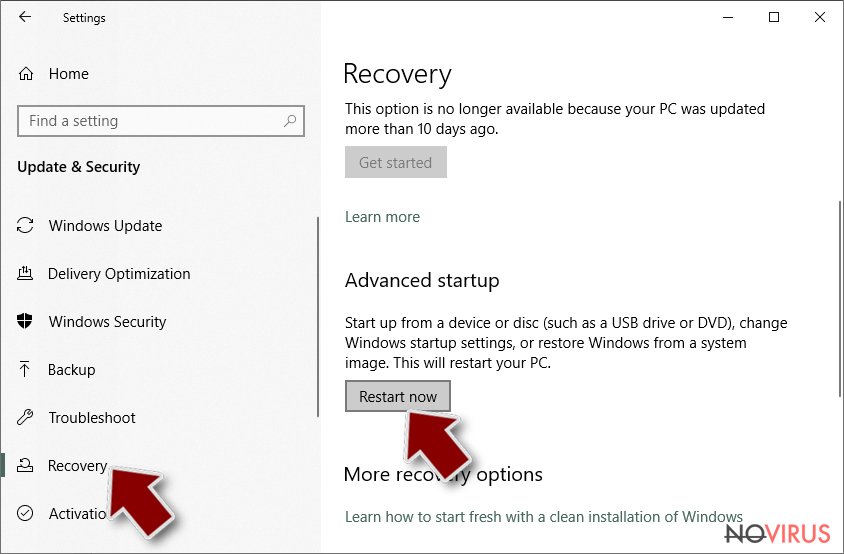
- On the left, pick Recovery.
- Scroll to find Advanced Startup section.
- Click Restart now.
- Choose Troubleshoot.
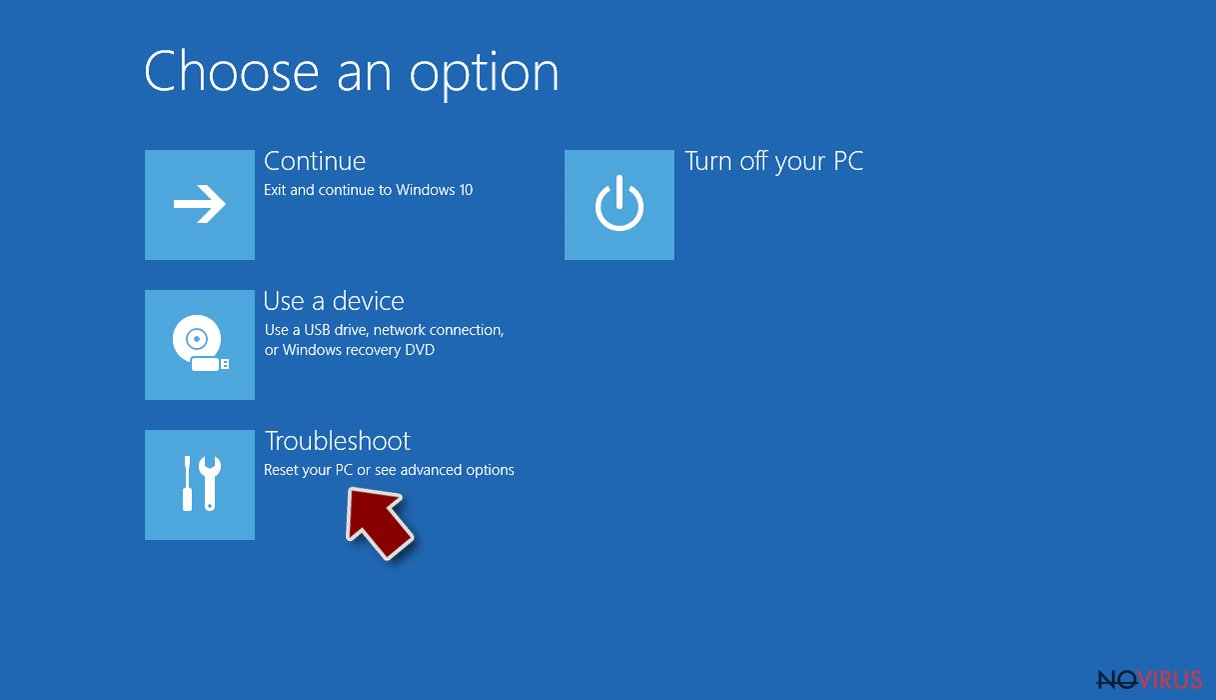
- Go to Advanced options.
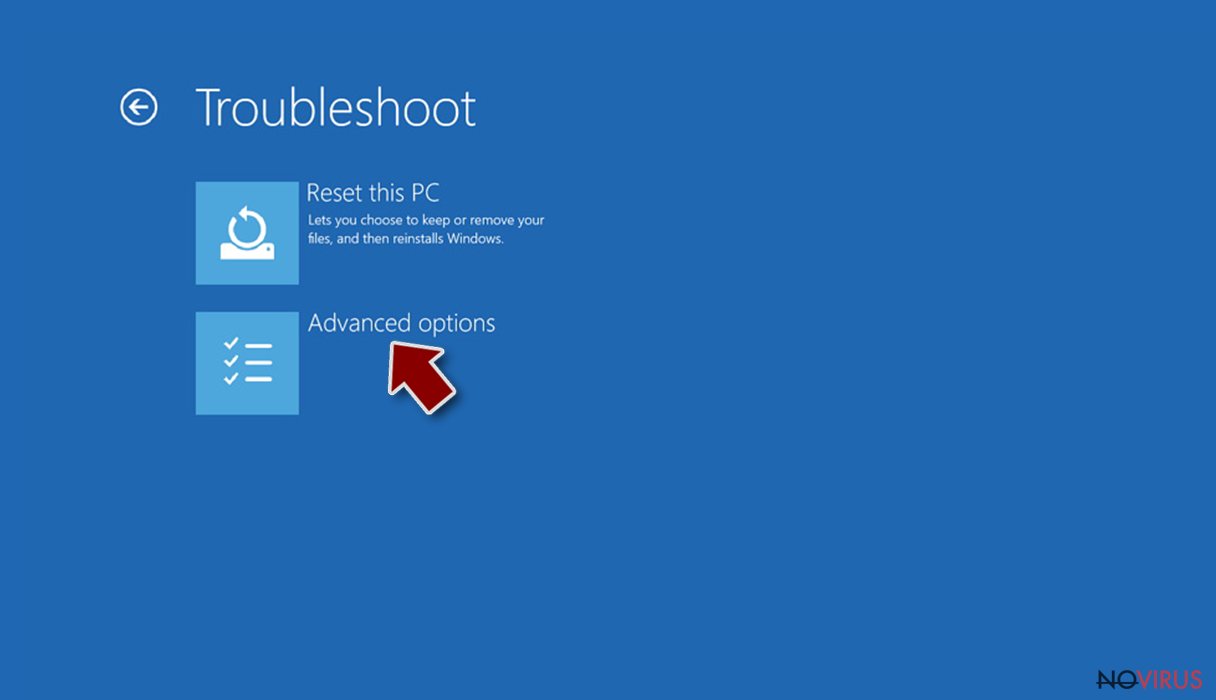
- Select Startup Settings.
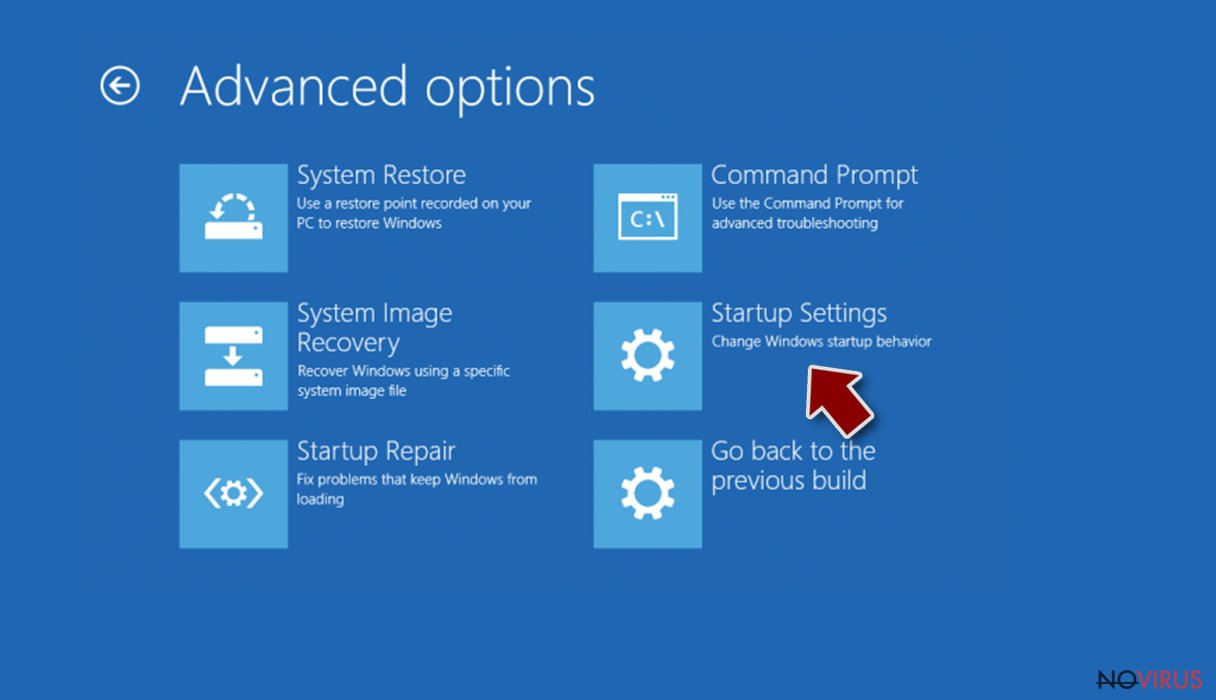
- Press Restart.
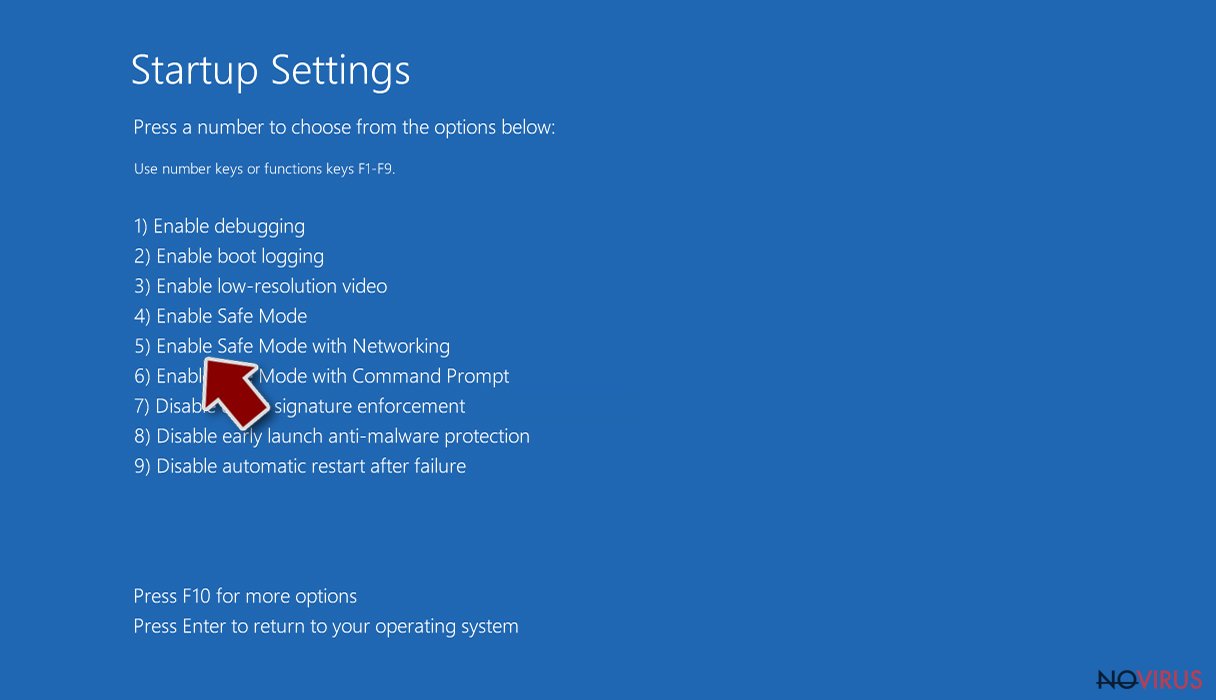
- Choose 5) Enable Safe Mode with Networking.
Step 2. End questionable processes
You can rely on Windows Task Manager that finds all the random processes in the background. When the intruder is triggering any processes, you can shut them down:
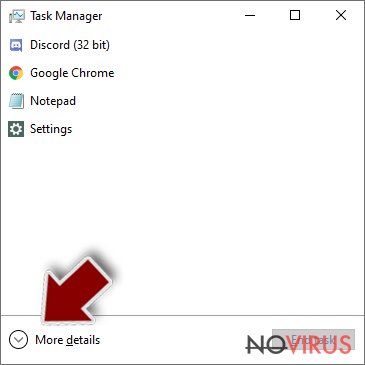
- Press Ctrl + Shift + Esc keys to open Windows Task Manager.
- Click on More details.
- Scroll down to Background processes.
- Look for anything suspicious.
- Right-click and select Open file location.
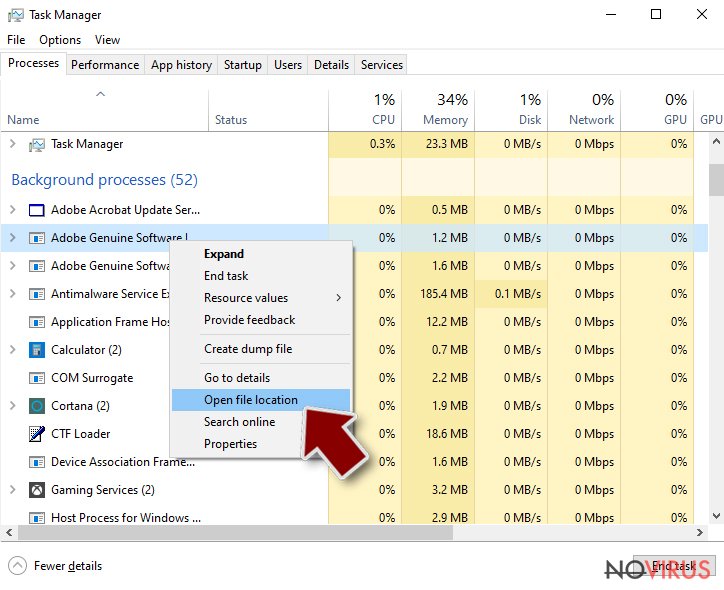
- Go back to the Process tab, right-click and pick End Task.
- Delete the contents of the malicious folder.
Step 3. Check the program in Startup
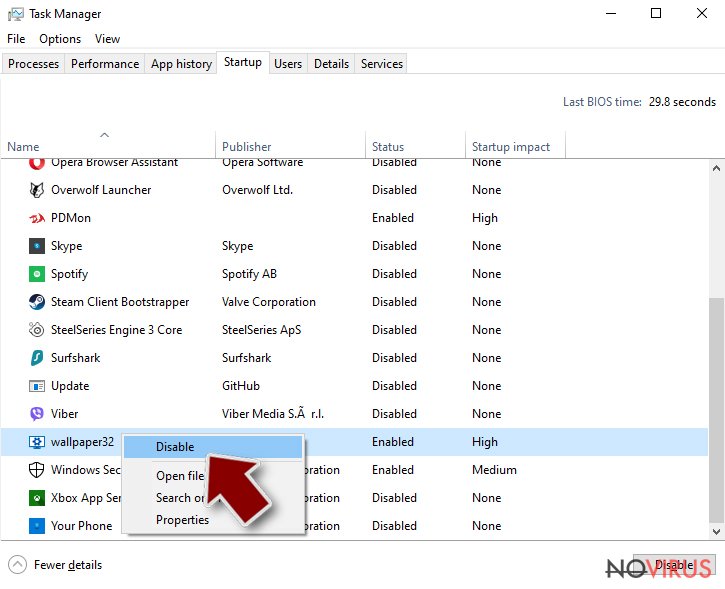
- Press Ctrl + Shift + Esc on your keyboard again.
- Go to the Startup tab.
- Right-click on the suspicious app and pick Disable.
Step 4. Find and eliminate virus files
Data related to the infection can be hidden in various places. Follow the steps and you can find them:
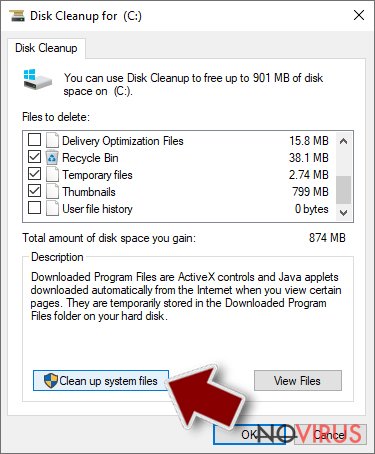
- Type in Disk Cleanup in Windows search and press Enter.
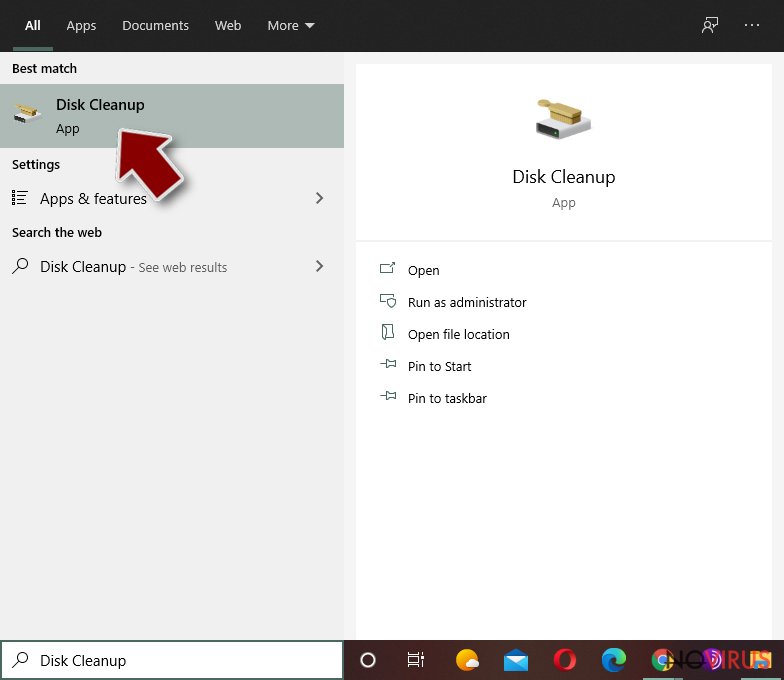
- Select the drive (C: is your main drive by default and is likely to be the one that has malicious files in) you want to clean.
- Scroll through the Files to delete and select the following:
Temporary Internet Files
Downloads
Recycle Bin
Temporary files - Pick Clean up system files.
- You can also look for other malicious files hidden in the following folders (type these entries in Windows Search and press Enter):
%AppData%
%LocalAppData%
%ProgramData%
%WinDir%
After you are finished, reboot the PC in normal mode.
Eliminate CrySiS using System Restore
-
Step 1: Restart your computer in Safe Mode with Command Prompt
Windows 7 / Vista / XP- Go to Start → Shutdown → Restart → OK.
- As soon as your computer starts, start pressing F8 key repeatedly before the Windows logo shows up.
-
Choose Command Prompt from the list

Windows 10 / Windows 8- Click on the Power button at the Windows login screen, and then press and hold Shift key on your keyboard. Then click Restart.
- Then select Troubleshoot → Advanced options → Startup Settings and click Restart.
-
Once your computer starts, select Enable Safe Mode with Command Prompt from the list of options in Startup Settings.

-
Step 2: Perform a system restore to recover files and settings
-
When the Command Prompt window appears, type in cd restore and press Enter.

-
Then type rstrui.exe and hit Enter..

-
In a new window that shows up, click the Next button and choose a restore point that was created before the infiltration of CrySiS and then click on the Next button again.


-
To start system restore, click Yes.

-
When the Command Prompt window appears, type in cd restore and press Enter.
It is strongly recommended to take precautions and secure your computer from malware attacks. To protect your PC from CrySiS and other dangerous viruses, you should install and keep a powerful malware removal tool, for instance, FortectIntego, SpyHunter 5Combo Cleaner or Malwarebytes.
How to prevent from getting ransomware
A proper web browser and VPN tool can guarantee better safety
As online spying becomes an increasing problem, people are becoming more interested in how to protect their privacy. One way to increase your online security is to choose the most secure and private web browser. But if you want complete anonymity and security when surfing the web, you need Private Internet Access VPN service. This tool successfully reroutes traffic across different servers, so your IP address and location remain protected. It is also important that this tool is based on a strict no-log policy, so no data is collected and cannot be leaked or made available to first or third parties. If you want to feel safe on the internet, a combination of a secure web browser and a Private Internet Access VPN will help you.
Recover files damaged by a dangerous malware attack
Despite the fact that there are various circumstances that can cause data to be lost on a system, including accidental deletion, the most common reason people lose photos, documents, videos, and other important data is the infection of malware.
Some malicious programs can delete files and prevent the software from running smoothly. However, there is a greater threat from the dangerous viruses that can encrypt documents, system files, and images. Ransomware-type viruses focus on encrypting data and restricting users’ access to files, so you can permanently lose personal data when you download such a virus to your computer.
The ability to unlock encrypted files is very limited, but some programs have a data recovery feature. In some cases, the Data Recovery Pro program can help recover at least some of the data that has been locked by a virus or other cyber infection.


