Uninstall Cerber 4.1.4 virus (Virus Removal Tutorial)
Cerber 4.1.4 virus Removal Guide
Description of Cerber 4.1.4 ransomware virus
Hackers strike again: Cerber 4.1.4 virus continues predecessors’ job
It seems that creators of Cerber are not willing to stop, or maybe they forgot to add something to recently discovered Cerber 4.1.0 and Cerber 4.1.1 versions. Cerber 4.1.4 virus is the latest update of this hazardous cyber threat. It slightly differs from previous variants. Now hackers spread virus via macro-enabled Word documents and send technical information to Command and Control server using three IP addresses. It still appends a string of four random characters to encrypted files (it’s a significant feature of 4.1.0 and 4.1.1), drops a ransom note called Readme.hta and changes desktop’s background to inform victims about Cerber 4.1.4 attack and demands to pay the ransom. Indeed, transferring few Bitcoins might seem like the only option to restore encrypted files; however, we want to discourage you from sponsoring and motivating cyber criminals to continue developing new ransomware projects and swindling money from ordinary computer users. Instead of analysing information in the ransom note and buying Bitcoins, concentrate on Cerber 4.1.4 removal. Employ FortectIntego or other reputable malware removal tool and wipe out this computer infection. Then, you will be able to recover your files from backups or try additional data recovery options.

As we already mentioned, hackers launched new malicious spam email campaign to spread Cerber 4.1.4 ransomware via macro-enabled MS Word documents. Previous versions of ransomware only used fake invoices, statements, and other official documents to spread the virus. This time, when users open an infected attachment, malicious Word documents asks to enable Macros. When users click “Enable Content” button, they let virus inside. Keep in mind that old versions of Word allow macros by default; only, latest versions disabled this function. Therefore, check your settings and make sure that macros are not enabled by default on your PC. It is one of the ways how to protect your PC from ransomware attack and unpleasant Cerber 4.1.4 removal. Unfortunately, the creators of malware know how to trick users and manage to infiltrate system quite easily. Once inside, it launches PowerShell commands and activates itself by executing win64.exe or win32.exe files (it depends whether you use 32-bit or 64-bit Windows system). As soon as the executable is dropped to %AppData% folder, malware starts encrypting user’s files with a strong and sophisticated algorithm. Cerber 4.1.4 virus has another unique and interesting feature that excludes it from previous variants. It uses three IP address to transfer technical and statistical information about infected computers to the remote Command and Control server. Previous versions of malware used only one IP address to send UDP packages to C&C server. Therefore, the virus became even more dangerous and damaging. If you’re lucky enough and haven’t encountered it yet, we recommend taking precautions and making data backups.
Malware distribution techniques
Just like predecessors, Cerber 4.1.4 ransomware virus also spreads via malicious spam emails. Hackers are great liars and persuaders. They make users believe that they receive an email from bank, financial institution or governmental institution; therefore, without any suspicion they open a provided fake invoice, statement or other official documents. It’s already known that document infected with Cerber 4.1.4 ransomware might be spread in a .zip archive as well. The subject line might have the title like ‘Invoice 369471’ or similar. Bear in mind that you should never open any attachment if you don’t know the sender or if he or she seems suspicious. The first signs that something might be wrong with an email are poor language skills or grammar mistakes; besides, these emails might not have an official logo or signature that represents the company. However, if you have accidentally opened the document, do not enable macros!
Cerber 4.1.4 removal and tips for data decryption
Talking about Cerber 4.1.4 removal and possibility to decrypt corrupted files, we have some good and some bad news. We will start with the good news by saying that it’s possible to delete virus from the PC completely. All you have to do is to install and update strong and professional malware removal program. We suggest using FortectIntego or SpyHunter 5Combo Cleaner. However, it might be hard to remove Cerber 4.1.4 because it might prevent from installing or updating security program, lock computer’s screen or cause other problems. In this case, check our detailed instructions presented below. The bad news is that data decryption is only possible if you have backup copies. Of course, several additional methods might be helpful and recover at least the most important files, and you can find them at the end of the article.
Getting rid of Cerber 4.1.4 virus. Follow these steps
In-depth guide for the Cerber 4.1.4 elimination
Important! →
The elimination guide can appear too difficult if you are not tech-savvy. It requires some knowledge of computer processes since it includes system changes that need to be performed correctly. You need to take steps carefully and follow the guide avoiding any issues created due to improper setting changes. Automatic methods might suit you better if you find the guide too difficult.
Step 1. Launch Safe Mode with Networking
Safe Mode environment offers better results of manual virus removal
Windows 7 / Vista / XP
- Go to Start.
- Choose Shutdown, then Restart, and OK.
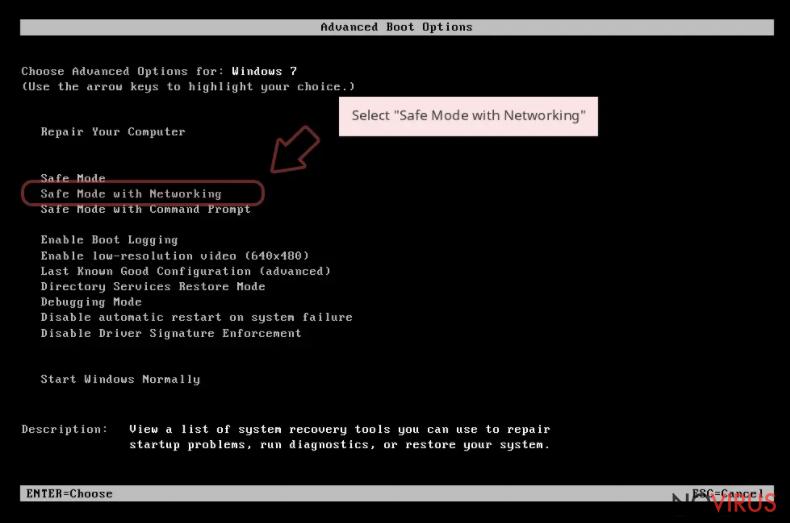
- When your computer boots, start pressing the F8 button (if that does not work, try F2, F12, Del, etc. – it all depends on your motherboard model) a few times until you see the Advanced Boot Options window.
- Select Safe Mode with Networking from the list.
Windows 10 / Windows 8
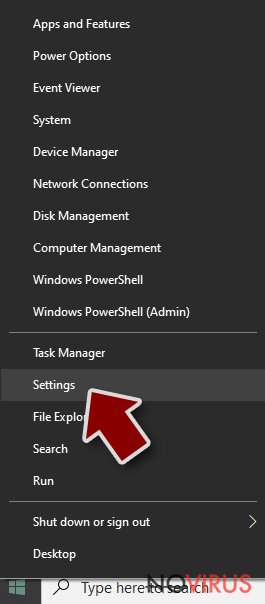
- Right-click the Start button and choose Settings.
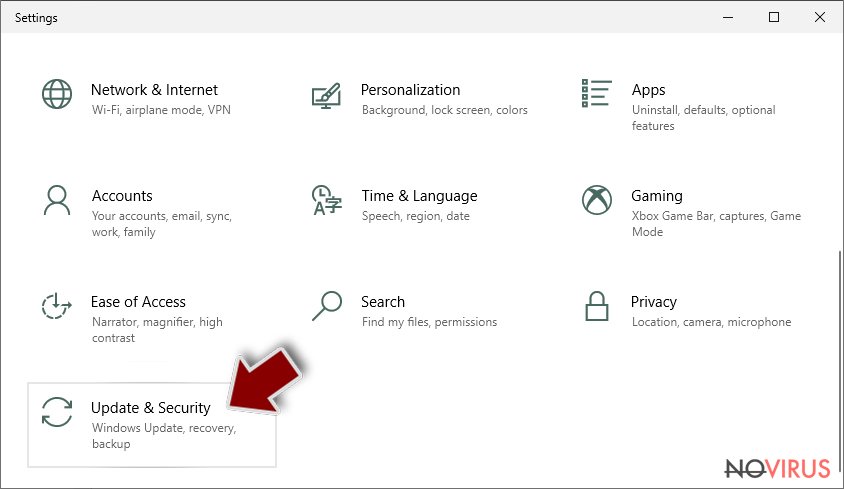
- Scroll down to find Update & Security.
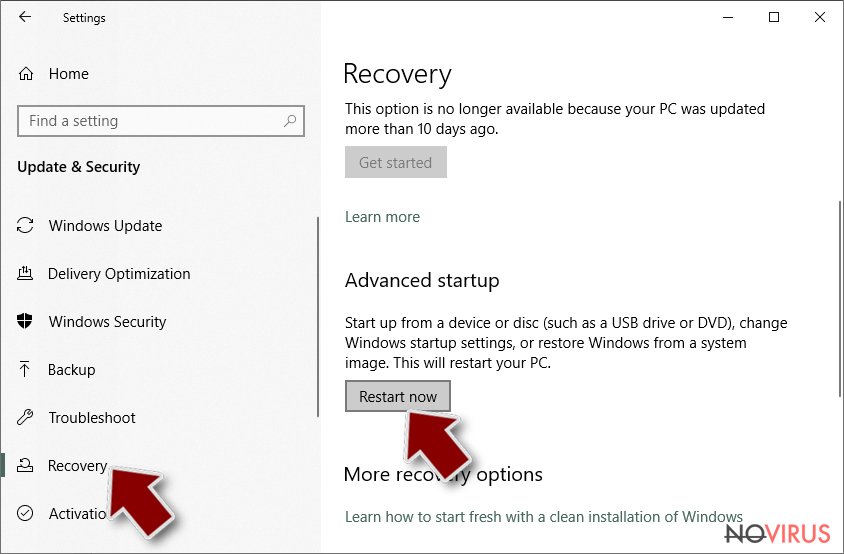
- On the left, pick Recovery.
- Scroll to find Advanced Startup section.
- Click Restart now.
- Choose Troubleshoot.
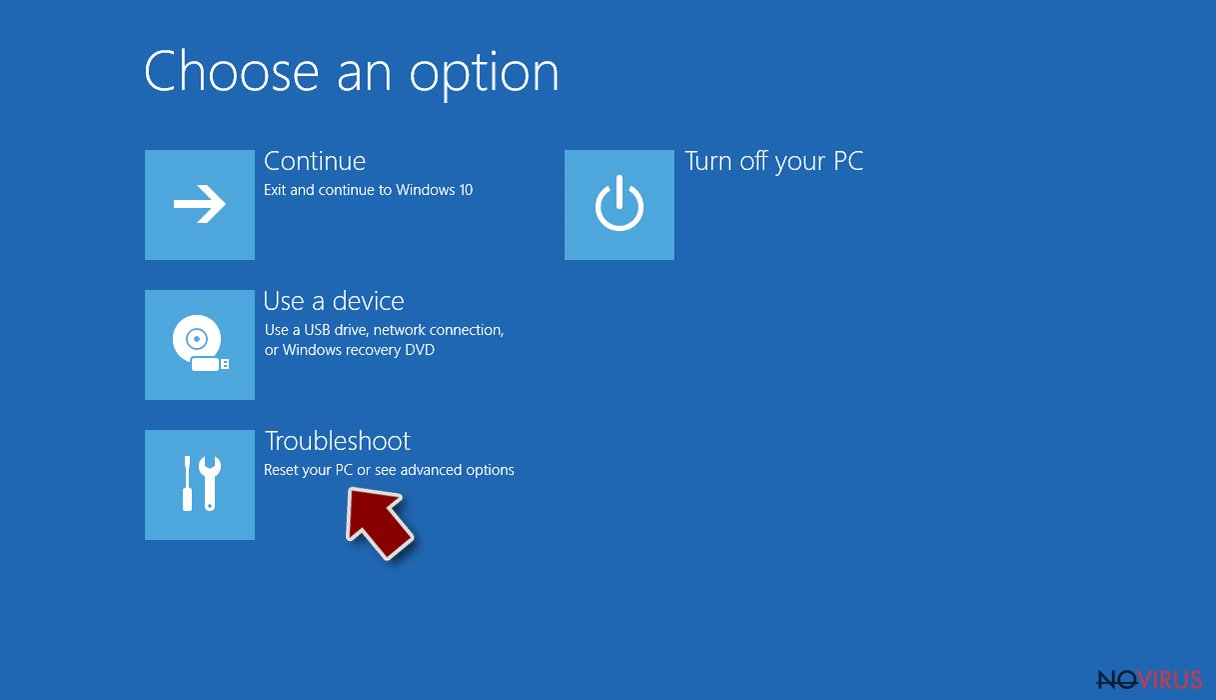
- Go to Advanced options.
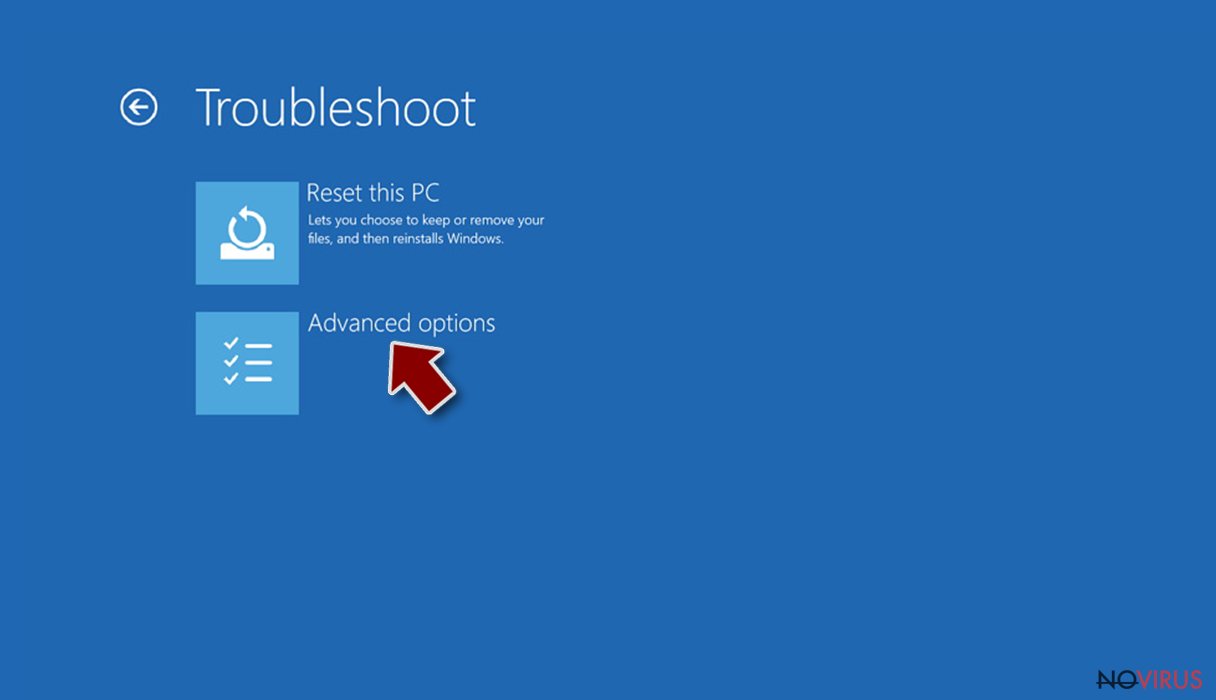
- Select Startup Settings.
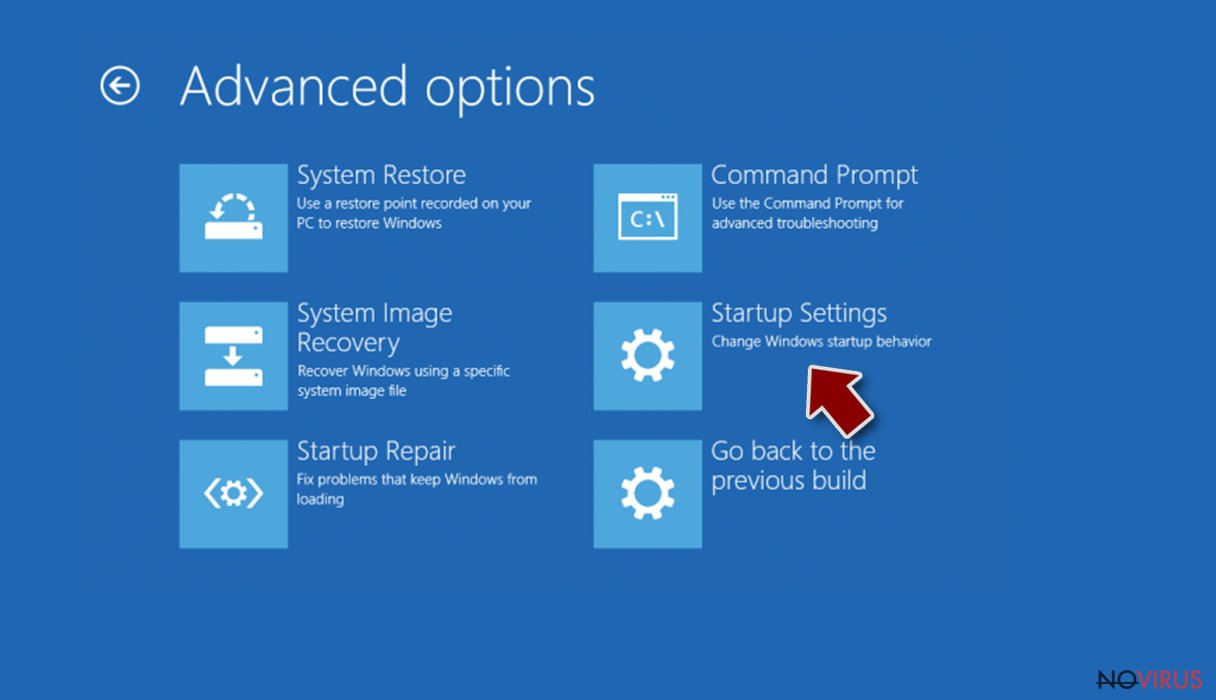
- Press Restart.
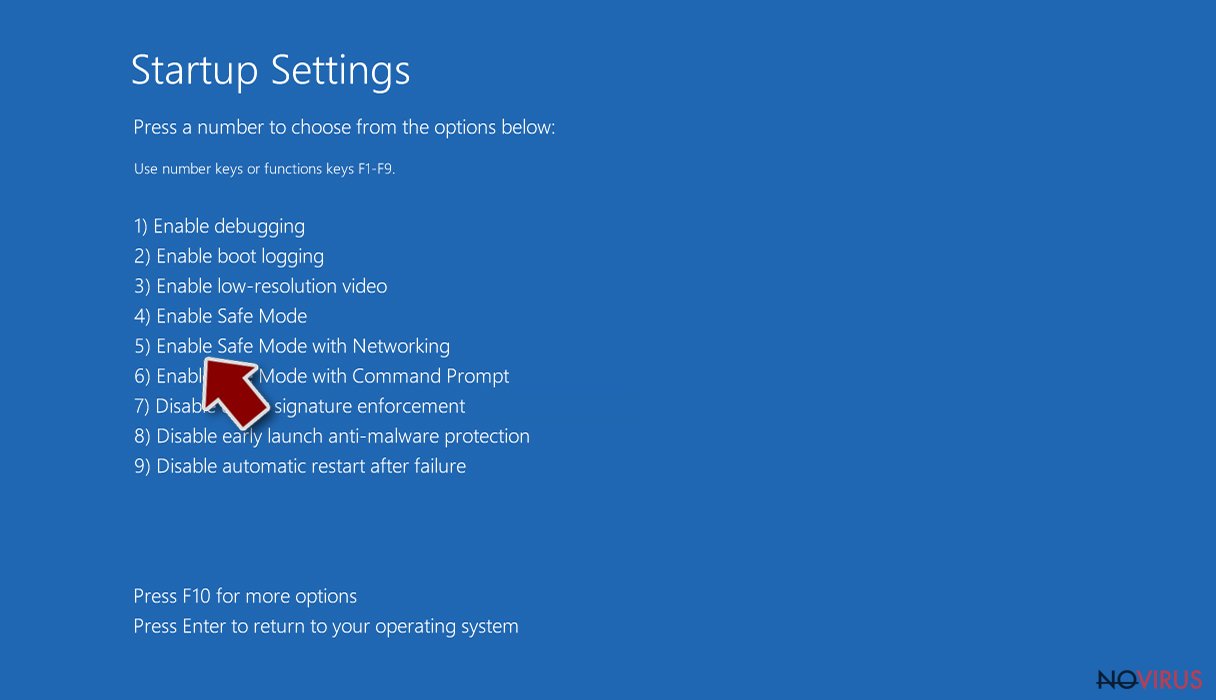
- Choose 5) Enable Safe Mode with Networking.
Step 2. End questionable processes
You can rely on Windows Task Manager that finds all the random processes in the background. When the intruder is triggering any processes, you can shut them down:
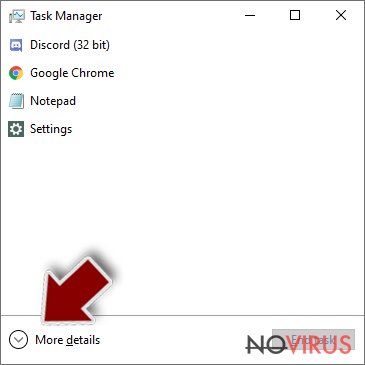
- Press Ctrl + Shift + Esc keys to open Windows Task Manager.
- Click on More details.
- Scroll down to Background processes.
- Look for anything suspicious.
- Right-click and select Open file location.
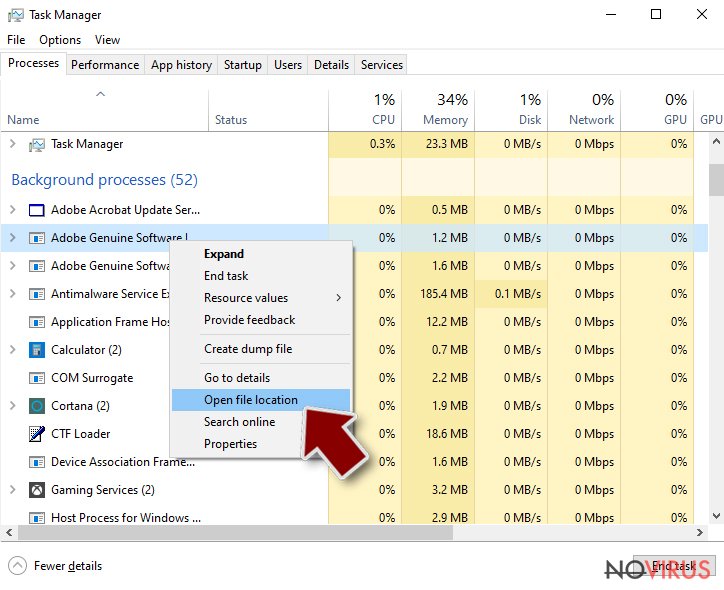
- Go back to the Process tab, right-click and pick End Task.
- Delete the contents of the malicious folder.
Step 3. Check the program in Startup
- Press Ctrl + Shift + Esc on your keyboard again.
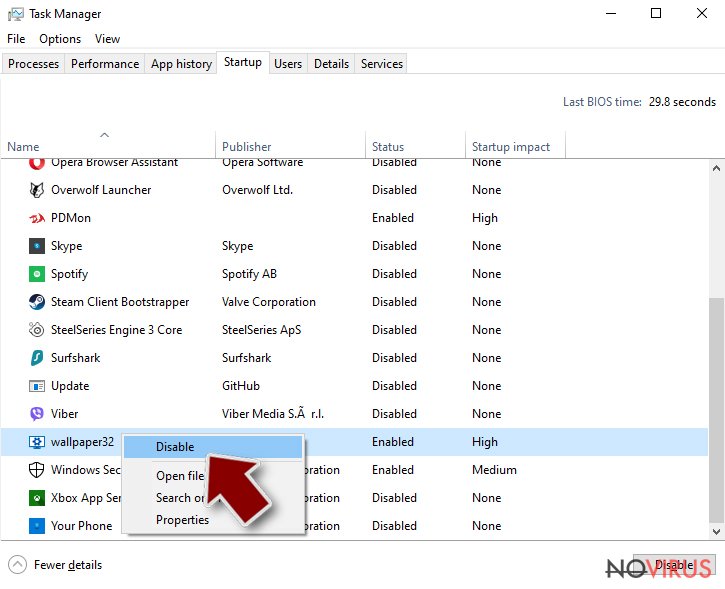
- Go to the Startup tab.
- Right-click on the suspicious app and pick Disable.
Step 4. Find and eliminate virus files
Data related to the infection can be hidden in various places. Follow the steps and you can find them:
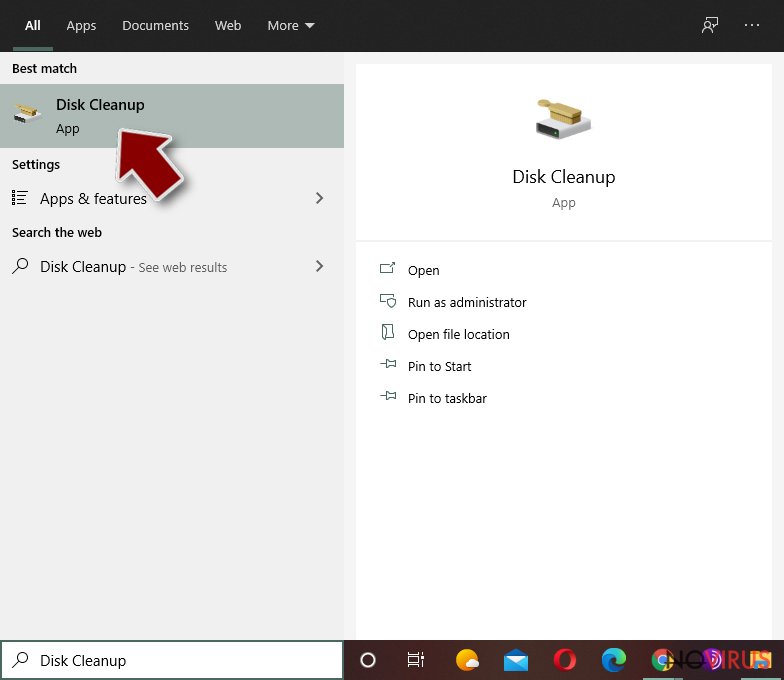
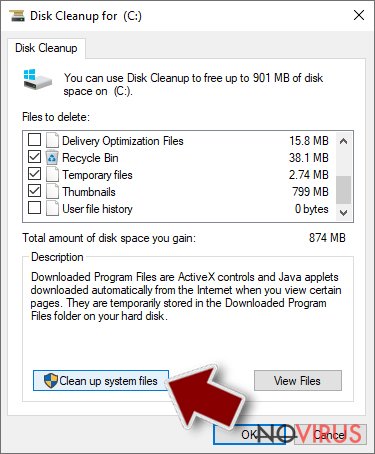
- Type in Disk Cleanup in Windows search and press Enter.
- Select the drive (C: is your main drive by default and is likely to be the one that has malicious files in) you want to clean.
- Scroll through the Files to delete and select the following:
Temporary Internet Files
Downloads
Recycle Bin
Temporary files - Pick Clean up system files.
- You can also look for other malicious files hidden in the following folders (type these entries in Windows Search and press Enter):
%AppData%
%LocalAppData%
%ProgramData%
%WinDir%
After you are finished, reboot the PC in normal mode.
Eliminate Cerber 4.1.4 using System Restore
-
Step 1: Restart your computer in Safe Mode with Command Prompt
Windows 7 / Vista / XP- Go to Start → Shutdown → Restart → OK.
- As soon as your computer starts, start pressing F8 key repeatedly before the Windows logo shows up.
-
Choose Command Prompt from the list

Windows 10 / Windows 8- Click on the Power button at the Windows login screen, and then press and hold Shift key on your keyboard. Then click Restart.
- Then select Troubleshoot → Advanced options → Startup Settings and click Restart.
-
Once your computer starts, select Enable Safe Mode with Command Prompt from the list of options in Startup Settings.

-
Step 2: Perform a system restore to recover files and settings
-
When the Command Prompt window appears, type in cd restore and press Enter.

-
Then type rstrui.exe and hit Enter..

-
In a new window that shows up, click the Next button and choose a restore point that was created before the infiltration of Cerber 4.1.4 and then click on the Next button again.


-
To start system restore, click Yes.

-
When the Command Prompt window appears, type in cd restore and press Enter.
Bonus: Restore your files
Using the tutorial provided above you should be able to eliminate Cerber 4.1.4 from the infected device. novirus.uk team has also prepared an in-depth data recovery guide which you will also find above.There are a couple of methods you can apply to recover data encrypted by Cerber 4.1.4:
Is Data Recovery Pro effective?
This tool is capable of locating and repairing missing and damaged files. Therefore, it might be helpful to recover at least the most important your files. Follow instructions below:
- Download Data Recovery Pro;
- Install Data Recovery on your computer following the steps indicated in the software’s Setup;
- Run the program to scan your device for the data encrypted by Cerber 4.1.4 ransomware;
- Recover the data.
Is it possible to recover files using Windows Previous Version functions
If System Recovery function has been enabled on your computer before Cerber 4.1.4 virus got inside your PC, you might be able to recover the most important files. Follow the steps below:
- Right-click on the encrypted document you want to recover;
- Click “Properties” and navigate to “Previous versions” tab;
- In the “Folder versions” section look for the available file copies. Choose the desired version and press “Restore”.
It is strongly recommended to take precautions and secure your computer from malware attacks. To protect your PC from Cerber 4.1.4 and other dangerous viruses, you should install and keep a powerful malware removal tool, for instance, FortectIntego, SpyHunter 5Combo Cleaner or Malwarebytes.
How to prevent from getting ransomware
Securely connect to your website wherever you are
Sometimes you may need to log in to a content management system or server more often, especially if you are actively working on a blog, website, or different project that needs constant maintenance or that requires frequent content updates or other changes. Avoiding this problem can be easy if you choose a dedicated/fixed IP address. It's a static IP address that only belongs to a specific device and does not change when you are in different locations.
VPN service providers such as Private Internet Access can help you with these settings. This tool can help you control your online reputation and successfully manage your projects wherever you are. It is important to prevent different IP addresses from connecting to your website. With a dedicated/fixed IP address, VPN service, and secure access to a content management system, your project will remain secure.
Recover files damaged by a dangerous malware attack
Despite the fact that there are various circumstances that can cause data to be lost on a system, including accidental deletion, the most common reason people lose photos, documents, videos, and other important data is the infection of malware.
Some malicious programs can delete files and prevent the software from running smoothly. However, there is a greater threat from the dangerous viruses that can encrypt documents, system files, and images. Ransomware-type viruses focus on encrypting data and restricting users’ access to files, so you can permanently lose personal data when you download such a virus to your computer.
The ability to unlock encrypted files is very limited, but some programs have a data recovery feature. In some cases, the Data Recovery Pro program can help recover at least some of the data that has been locked by a virus or other cyber infection.


